Cast, Scenes, Montage, Export: the four screens behind a finished video
Most AI video tools are one box and a Generate button. Four screens sounds like more work; it is actually the difference between a clip and a video.
A single prompt box is a lovely demo and a bad workflow. It gives you one clip, and one clip is not a video - it has no second beat, no reaction shot, no ending. Skitify is built as four screens instead, because a short video has four decisions in it and they are easier to make one at a time.

Step 1 - Cast: who is in this one
You pick the characters before you write anything. It sounds backwards until you try it the other way: a script written first is a script full of nameless people, and a nameless person is exactly what a video model draws differently every time.
Picking saved or public characters is free. Generating a brand-new look costs tokens, and that is the only part of this step that does. Most sessions after the first are free here, because the cast you built last week is still there.
Step 2 - Scenes: the script, one shot at a time
A scene is one shot: a line or two of description, then the dialogue, with speakers tagged @Name so the render knows whose mouth moves. Each scene carries its own settings - the quality tier, whether it gets burned-in subtitles, how long it runs.
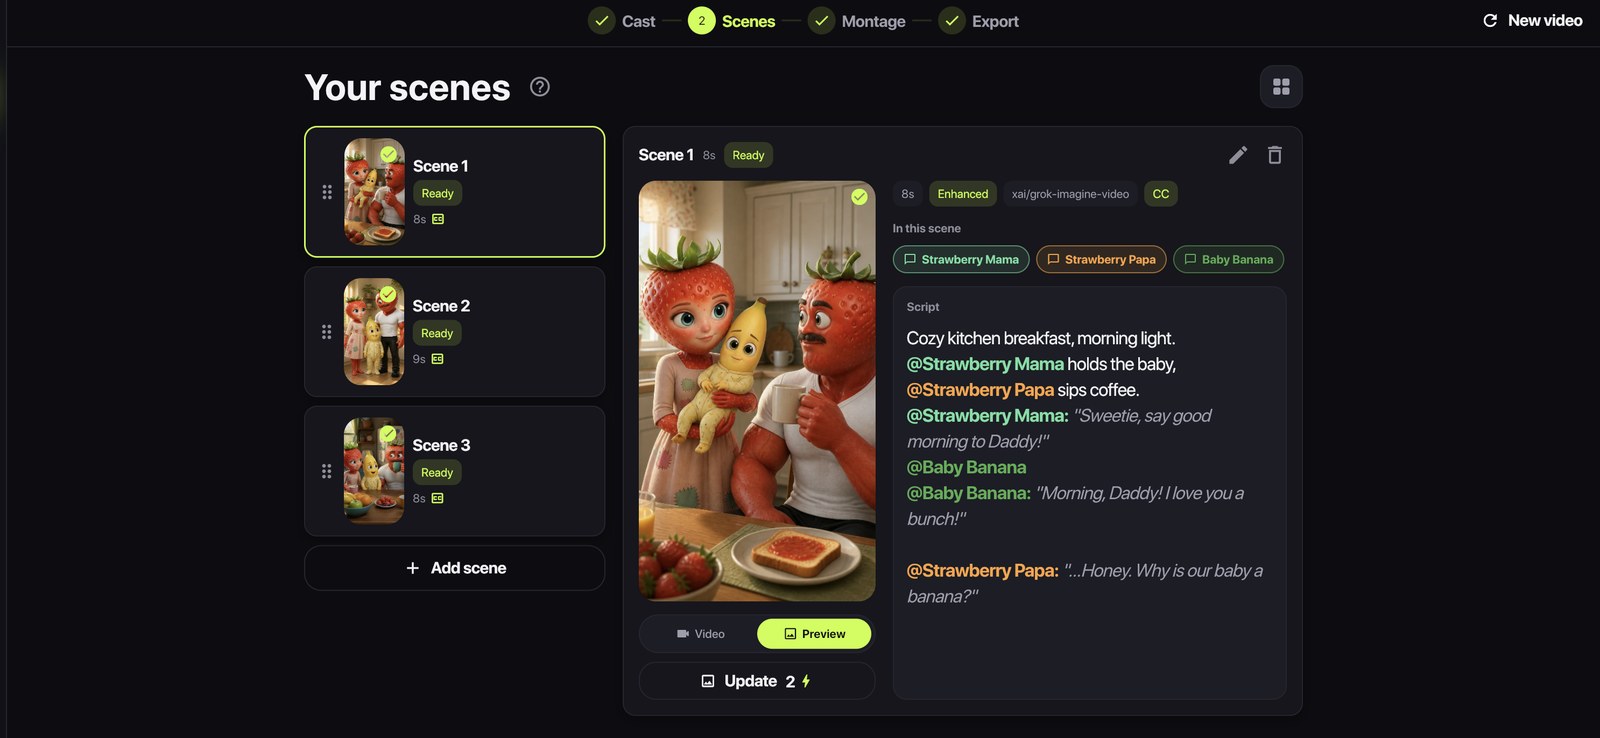
Scene length is the setting people fiddle with most and should mostly leave alone. Left on Auto it follows the length of the dialogue, which is usually right: a five-word line does not need four seconds, and giving it four seconds produces a clip with two seconds of a character standing there.
This is also where you should make a still preview before rendering. A still costs a couple of tokens, shows you the framing, and then acts as the reference the video model animates - so the shot you approved is the shot you get.
Step 3 - Montage: the cut
Generating clips is the slow part; cutting them is not. When the clips are ready they arrive stitched into one video with a timeline under it, and everything you do there is free and instant, because a cut is not a render - it is a list of ranges.
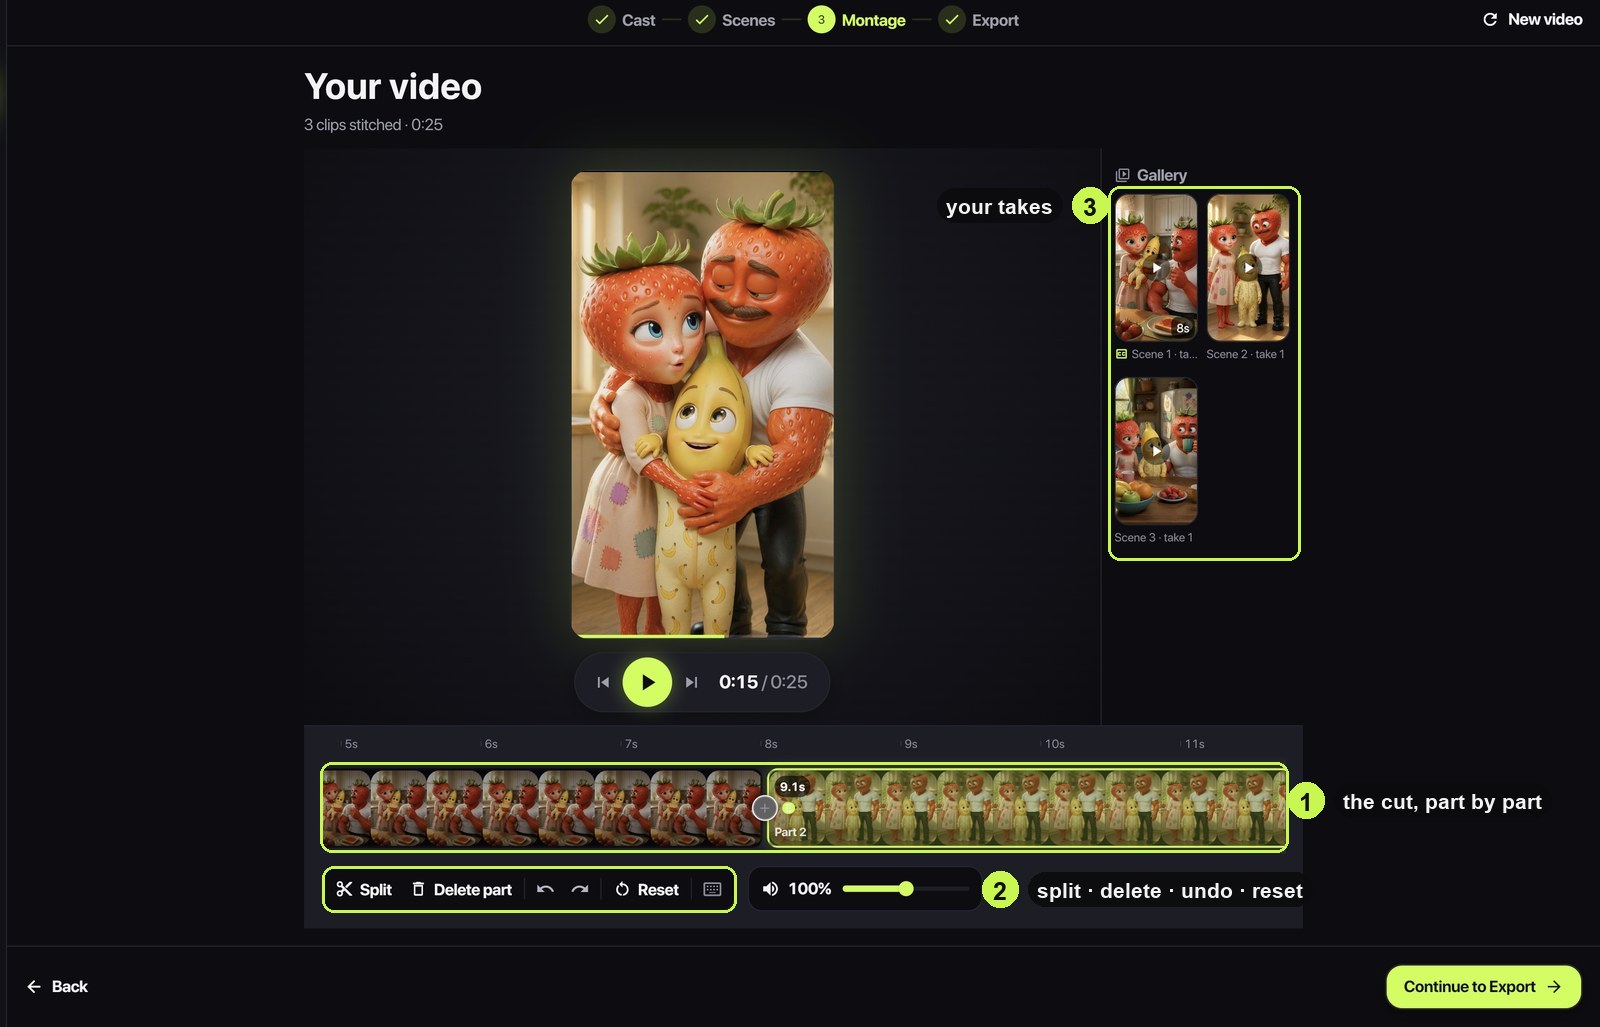
- Split a part, delete a part, trim either end, drag parts into a different order.
- Undo and redo the whole way back; Reset rebuilds the timeline from the current scenes.
- The gallery on the right holds every take this project has ever generated, including the ones a re-roll replaced. Drag one onto the timeline to use it instead.
The last point is the one worth remembering. A re-roll does not throw away the clip it replaced, so "actually, the first version was better" is a drag-and-drop rather than a re-render.
Step 4 - Export: name it and take it
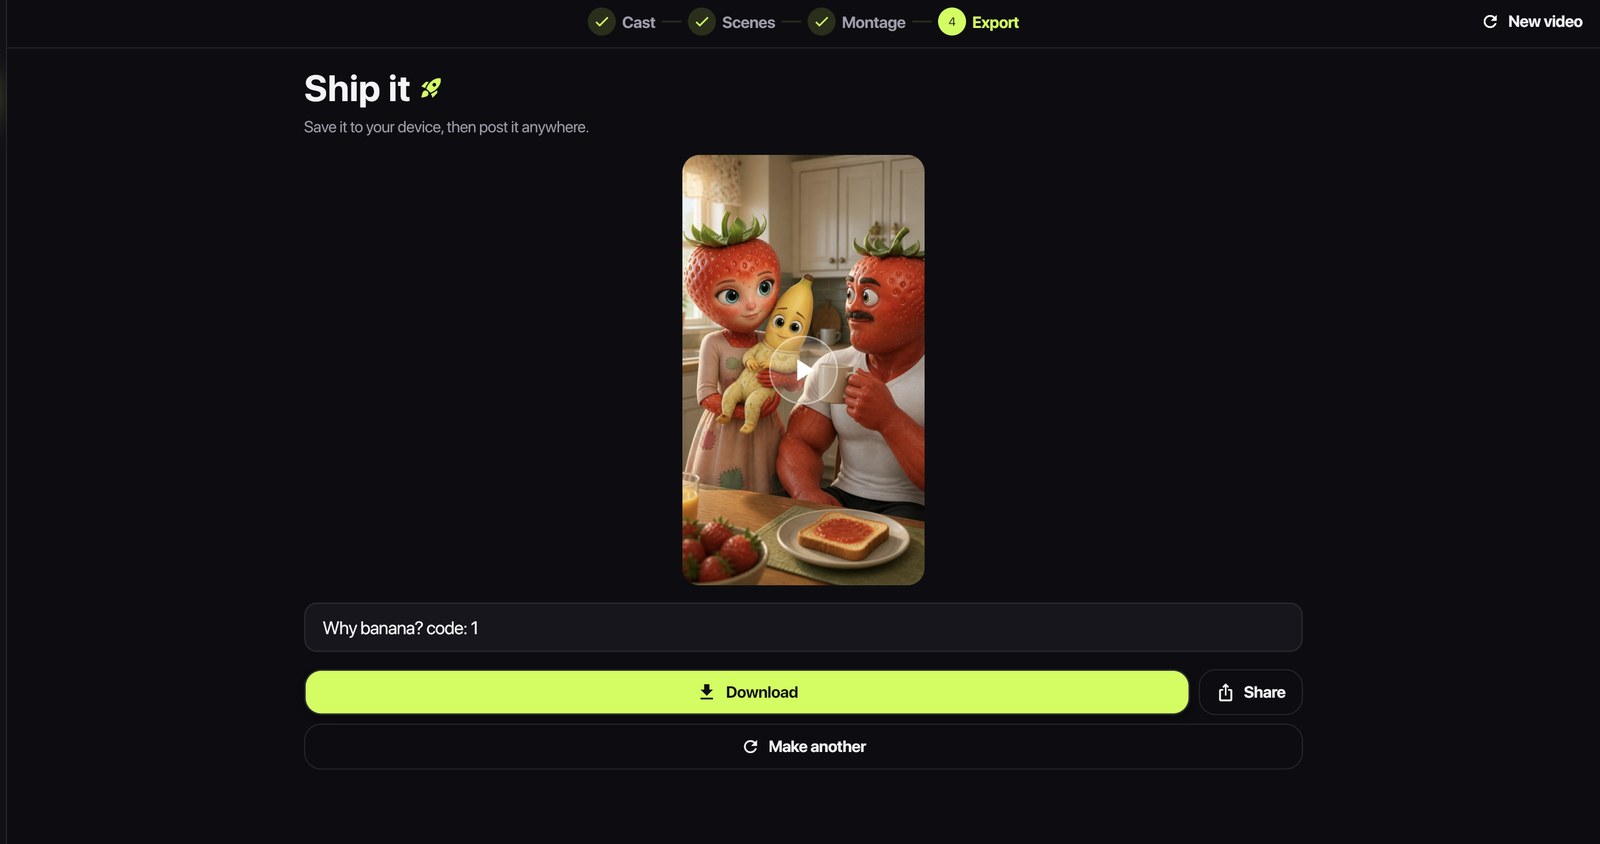
Give the video a name, download it, share it. The download is where the full-resolution file gets rendered with your cuts applied - up to that point the player is showing you a lightweight preview, which is why cutting stays instant.
Why not just one button
Because the four decisions are genuinely separate, and mixing them is where AI video tools become frustrating. Who is in it is a casting decision. What they say is writing. Which take to keep is editing. What resolution to hand over is delivery. Collapsing all four into one prompt means every change re-rolls everything, and you pay for the whole video again to fix two seconds of it.
Four steps also means you can stop halfway. A draft sits in My Videos with whatever you had - a cast and half a script, or three clips and no cut - and picks up where you left it.